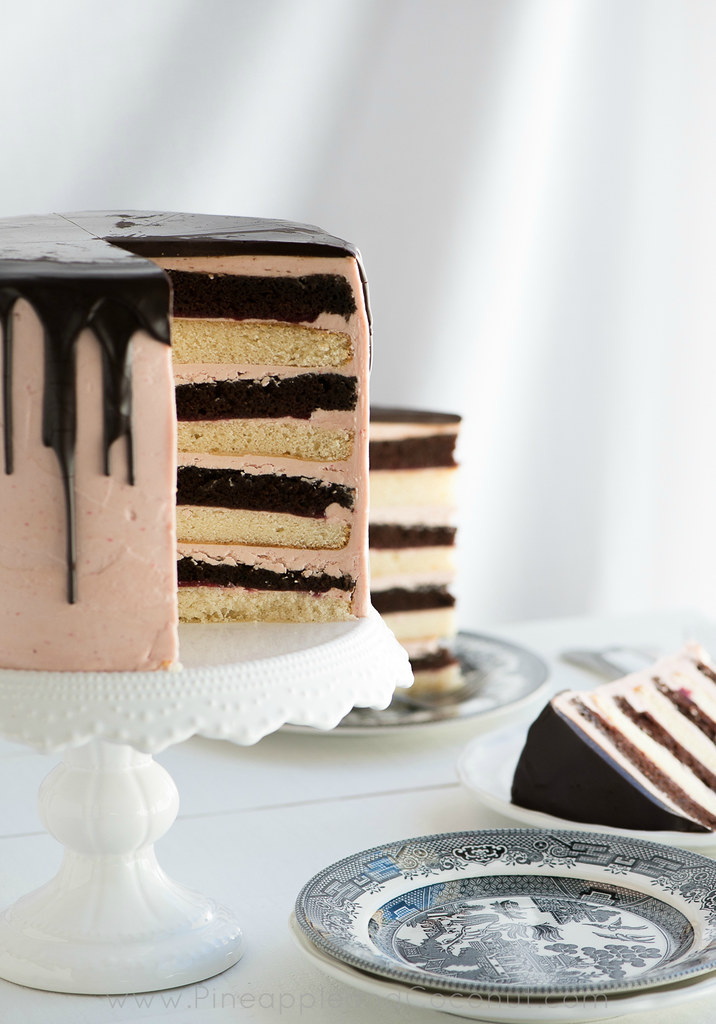
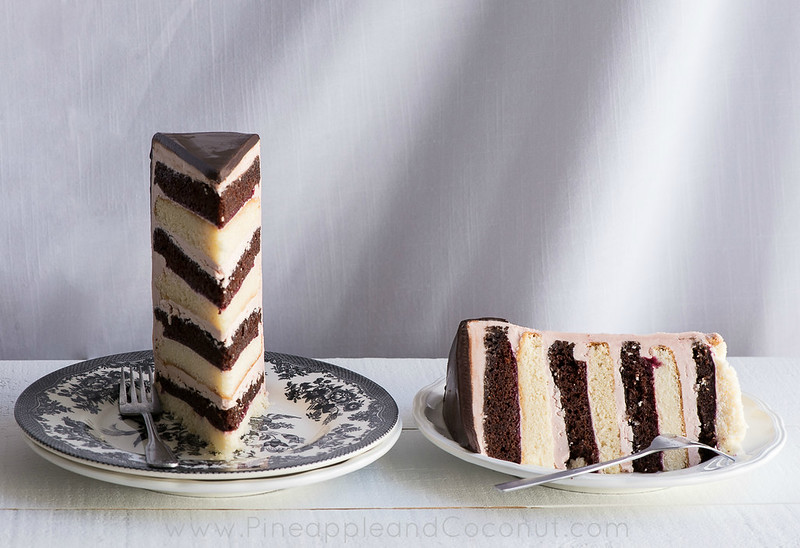
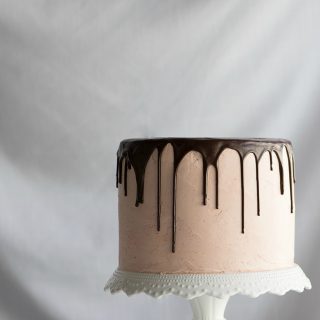
Chocolate Vanilla Tuxedo Cake with Raspberry White Chocolate Buttercream. A cake title to match the height of this massive cake. I seem to really like making these crazy tall cakes. I have this problem where I go ALL OUT and make cakes like this 8 layer (16 if you count the filling) or you know, smaller 4 layer cakes for my kids' birthdays. Because one layer cakes aren't as much fun.

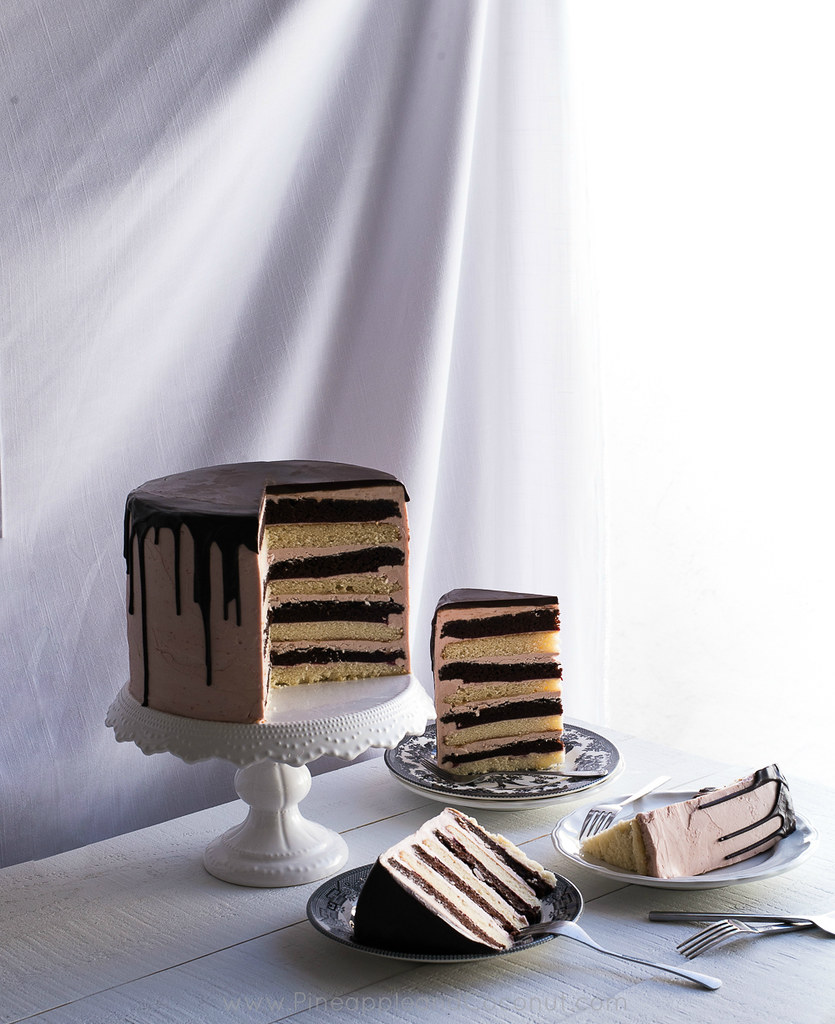
This tuxedo cake really doesn't look that big in pictures. But that cake stand is 10" across and my cake barely fit. And it is 8" high. I thought I was going to drop it every time I took it in and out of the fridge. And I had to remove a shelf from my fridge to fit the completed cake in it without mashing it.
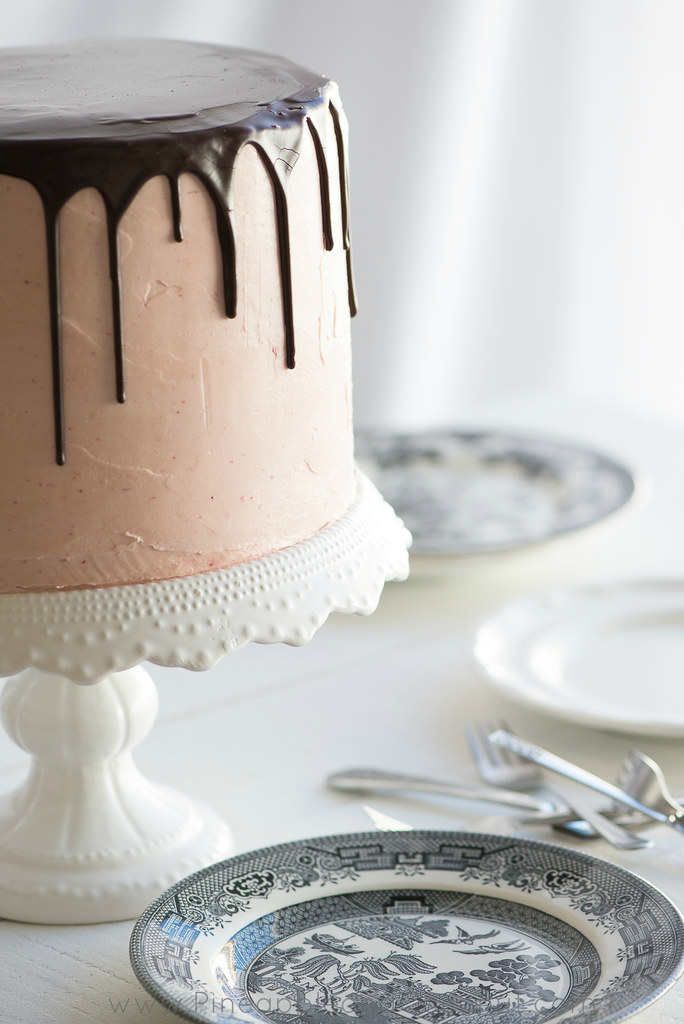
I wanted to make this tuxedo cake for an excuse to use my newest cake stand. My friend Miriam is always telling me about how she finds amazing cake stands at Homegoods near her, but the one near me is very hit and miss with more misses than hits. One day when I was passing by to go to another store I decided to stop by to see if they had anything new in and I found this gorgeous white cake stand that just barely fit this giant cake.
I am glad I decided to stop by on a whim because I hit the cake stand jackpot at Homegoods. $12 for this beauty. Quite the steal if you ask me so I had to have it. And make a cake worthy of this stand.
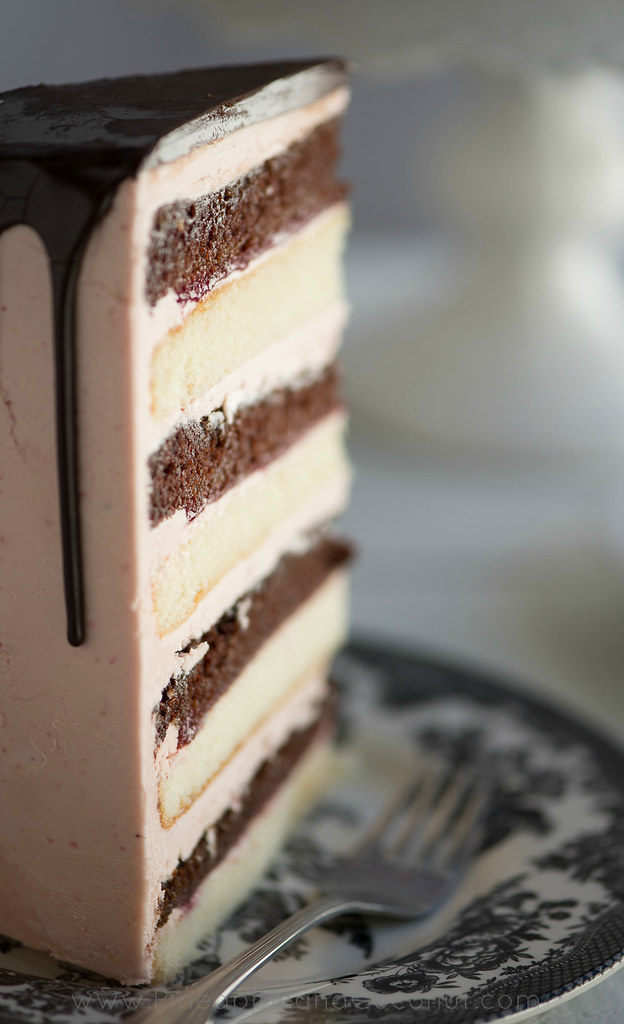
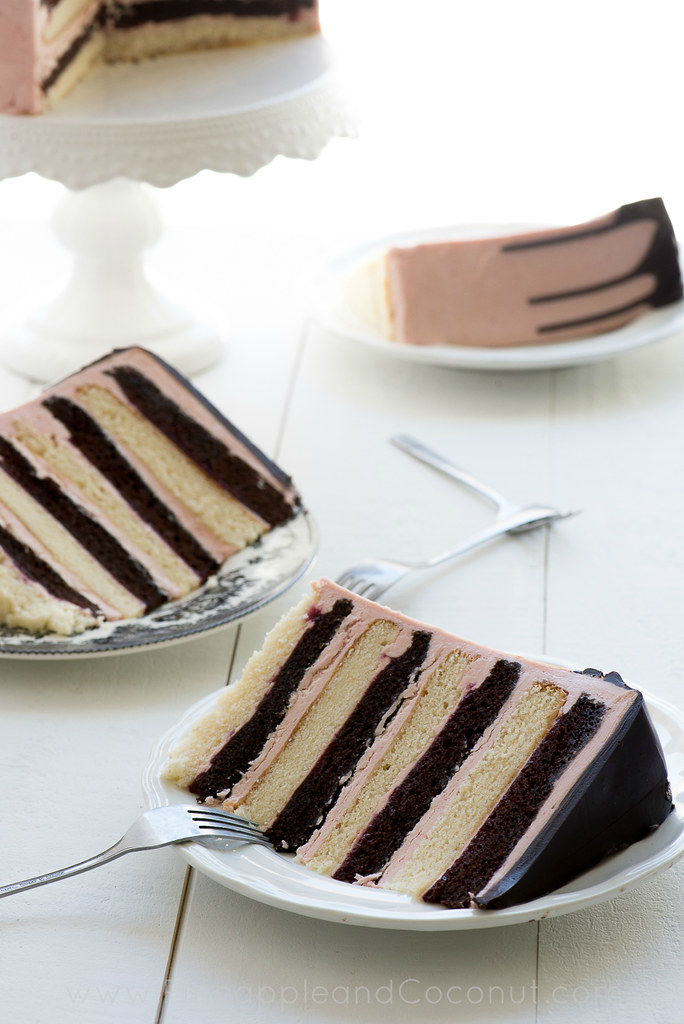
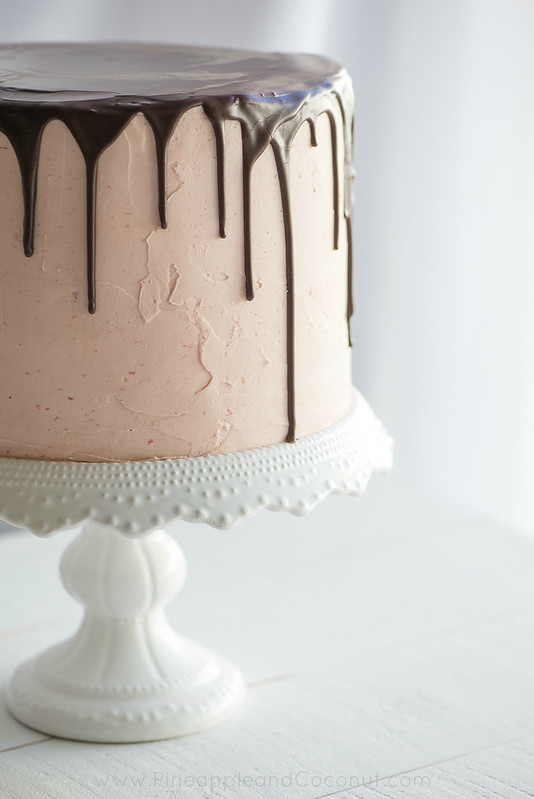
The flavors of this tuxedo cake are so good together but I made my layers not exactly how I wanted so you can barely see the raspberry puree filling. It is between the vanilla and chocolate cake layers instead of between the chocolate and vanilla so you would see it right under the vanilla layers. I also could have had more of the puree in it so that layer would have been a little thicker. But the cake turned out so tall I really didn't want it to be any taller.
I realized I don't photograph most of the cakes I make. I always make a fancy layer cake for birthdays, anniversaries etc. But I make it and then we dig in, then my husband takes 80% of whats left to share at work because I don't need a whole cake hanging around the house. I usually snap a few quick pics with my phone for Instagram or whatnot, but not many have made it to my blogs. I have a couple on my old blog , but GAAHH the styling and lighting is awful. The crazy thing is that I have been using the same camera this whole time. My Nikon d80 dslr and a zoom lens back then, 50 mm lens now. Here is a pic of one of cakes from years ago. Please be kind... The cake tasted amazing and my mom loved it. So to say my styling and photographing skills have improved since then are an understatement. I am proud of how hard I have worked to have improved my skills this much all self-taught.
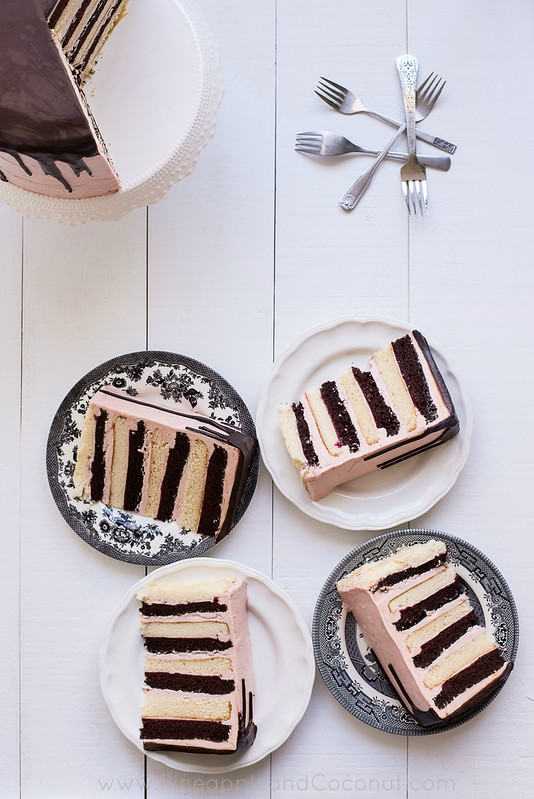
I LOVE to shoot lighter photos especially backlit photos. I read tons of photo tutorials and practice daily with my photography. Its so much fun for me and really turning into a passion, more than it ever was before. I have always loved photography, so to create the vision I had for this cake was a big challenge, I actually drew out on paper what and how I wanted to style the cake.
Now my warning for this tuxedo cake recipe - Its really long. There's essentially two cakes, plus filling, plus a doubled buttercream recipe and ganache. I couldn't just make a small cake. Most of this cake is now sectioned and wrapped up and sealed in baggies in my freezer. I will have cake for months. Like that is ever a bad thing. Please leave a comment or email me if you have any questions about the recipe.
Chocolate Vanilla Tuxedo Cake with Raspberry White Chocolate Buttercream
Ingredients
For the Chocolate Cake:
- 3 cups all-purpose flour
- 2 cups granulated sugar
- ½ cup unsweetened cocoa powder
- 2 teaspoons baking soda
- ½ teaspoon salt
- 1 cup buttermilk
- 4 ounces dark chocolate melted and cooled, cooled for about 15 min
- ½ cup plus 1 tablespoon boiling water
- ¾ cup olive oil
- 2 large eggs, room temp
- 2 tablespoons vinegar, not wine vinegar
- 1 tablespoon vanilla
For the Vanilla Cake:
- 2 ¼ cups cake flour plus more for dusting the pans
- 1 cup buttermilk, room temperature
- 4 large egg whites plus 2 whole eggs, room temperature
- 2 teaspoon vanilla extract
- 1 ½ cups granulated sugar
- 4 teaspoons baking powder
- ½ teaspoon sea salt
- 12 tablespoons unsalted butter, 1 ½ sticks, softened but still cool, cut into tablespoon sized pieces
For the Raspberry Filling:
- 1 – 12 ounce bag frozen raspberries, thawed
- ⅓ cup granulated sugar
- 1 teaspoon lemon juice
For the Raspberry White Chocolate Buttercream:
- Makes 10 cups
- ¾ cup of cold water
- 3 cups granulated sugar
- ½ teaspoon salt
- 10 egg whites
- 2 lbs unsalted butter, cut into tablespoon sized pieces, softened but still cool
- ½-¾ c raspberry puree
- 4 ounces white chocolate melted and cooled
Ganache
- 4 ounces bittersweet chocolate
- 4 ounces heavy cream
- 2 teaspoon honey
Instructions
For the Chocolate Cake:
- Preheat oven to 350F with rack in the center.
- Heat oven to 350 degrees. Grease 2-9 inch cake pans with butter. Place a round piece of parchment paper on the bottom of one of the pans and grease again. Sprinkle a few teaspoon of flour over the butter and shake to cover the parchment paper evenly. Shake out the excess flour. Repeat with other pan.
- Whisk together the dry ingredients (sugar, flour, cocoa powder, baking soda and salt)in a large bowl.
- In a large bowl or bowl of stand mixer whisk eggs till slightly thickened and a pale color.Add in the buttermilk, vanilla, oil and vinegar and whisk/beat well.
- Add in the melted and cooled chocolate and whisk/beat until combined well
- Either add the flour mixture into the wet ingredients OR the wet into the flour and mix just to combine. Add in the boiling water and mix again just to combine. Scrape down the sides of the bowl with a spatula to make sure all the dry ingredients are incorporated.
- Divide batter evenly between two prepared cake pans spreading the batter to pan walls and smooth tops with a spatula. Place pans next to each other on a center rack of the oven.
- Bake until thin skewer or toothpick inserted in the center comes out clean, 23 to 25 minutes.
- Let cakes rest in pans for 10 minutes. Loosen from sides of pans with a knife, if necessary, and invert onto wire racks. Let cool another 20 min. Carefully wrap the cakes in plastic wrap and place in resealable baggies and freeze completely
For the Vanilla Cake:
- Heat oven to 350 degrees. Grease 2-9 inch cake pans with butter. Place a round piece of parchment paper on the bottom of one of the pans and grease again. Sprinkle a few teaspoon of flour over the butter and shake to cover the parchment paper evenly. Shake out the excess flour. Repeat with other pan.
- Combine the room temperature buttermilk, egg whites, whole eggs and vanilla extract in a measuring cup and stir well to combine.
- Combine the cake flour, sugar, baking powder, and salt in bowl of a stand or electric mixer at low speed until well mixed. Keeping the mixer on low add the butter in one table spoon at a time until mixture resembles very fine crumbs.
- Add all but ½ cup of milk mixture to the flour mixture and raise speed to medium speed for about 1 ½ minutes. Add remaining ½ cup of milk mixture and beat 30 seconds more. Stop mixer and scrape sides of bowl. Return mixer to medium speed and beat 20 seconds longer.
- Divide batter evenly between two prepared cake pans spreading the batter to pan walls and smooth tops with a spatula. Place pans next to each other on a center rack of the oven.
- Bake until thin skewer or toothpick inserted in the center comes out clean, 23 to 25 minutes.
- Let cakes rest in pans for 10 minutes. Loosen from sides of pans with a knife, if necessary, and invert onto wire racks. Let cool another 20 min. Carefully wrap the cakes in plastic wrap and place in resealable baggies and freeze completely.
For the Raspberry Filling:
- Place the thawed raspberries, sugar and lemon juice in a sauce pan, bring to a boil. Reduce heat to a simmer and stir occasionally until reduced and thickened, about 8 minutes. Transfer to an airtight container and chill completely before use. If seedless puree is desired, pour the hot puree from the pan into a strainer set over a bowl. Scrape the puree and press against the bottom of the strainer with a spatula to pass the seedless puree into the bowl. Stop to rinse the spatula and scrape the puree off the underside of the strainer. Keep scraping and pressing until all the puree is in the bowl and only seeds are left in the strainer. Chill completely before use.
For the Raspberry Buttercream:
- Separate the egg whites into the bowl of a standing mixer fitted with the wire whip/whisk attachment
- Combine the sugar, salt and water into a 1-quart, heavy- bottomed saucepan. Stir to combine. Clip on a candy thermometer and heat the mixture over medium-high. After about 5 minutes turn the mixer on high speed, begin whipping the egg whites to stiff peaks, lower the mixer to medium speed. Raise the heat under the sugar syrup to bring the syrup to 245°F. When the syrup is at 245°F, immediately remove from heat, remove the thermometer and slowly pour the syrup into the meringue, while the whisk is still mixing on medium, being careful not to splatter.
- After 1 to 2 minutes increase the mixer speed to medium-high for 3 to 4 minutes, or until the meringue is cooled. The bowl should feel cool to touch. This takes about 7 minutes. Lower the speed to medium and add the butter 1 tablespoon at a time. It might look soupy but keep mixing. Increase the mixer speed to high for 1 to 2 minutes, or until the butter is fully incorporated. Switch to the paddle attachment. Add in the melted and cooled white chocolate Add in the raspberry puree a few tablespoons at a time with the mixer on low, stopping to scrape down the sides as necessary. Taste and add more puree if desired. Keep at room temperature if using the same day. If not, keep chilled in an airtight container and thaw at room temp before using. Transfer to a mixer and mix on low to rewhip the buttercream.
For the Ganache:
- Chop the chocolate and place in a bowl.
- Heat the cream in a saucepan over medium heat until steaming and small bubbles form around the edges. Pour the cream over the chocolate and let sit 5 minutes. Slowly stir the mixture until smooth, do not mix fast or whip. Add in the honey. Let cool about 15 minutes until slightly thickened before using. You don’t want it to runny or to firm
For assembly:
- Unwrap one cake at a time, thaw for about 10 minutes and then carefully cut in half with a sharp long knife. Repeat with all layers making 8 thin cake layers.
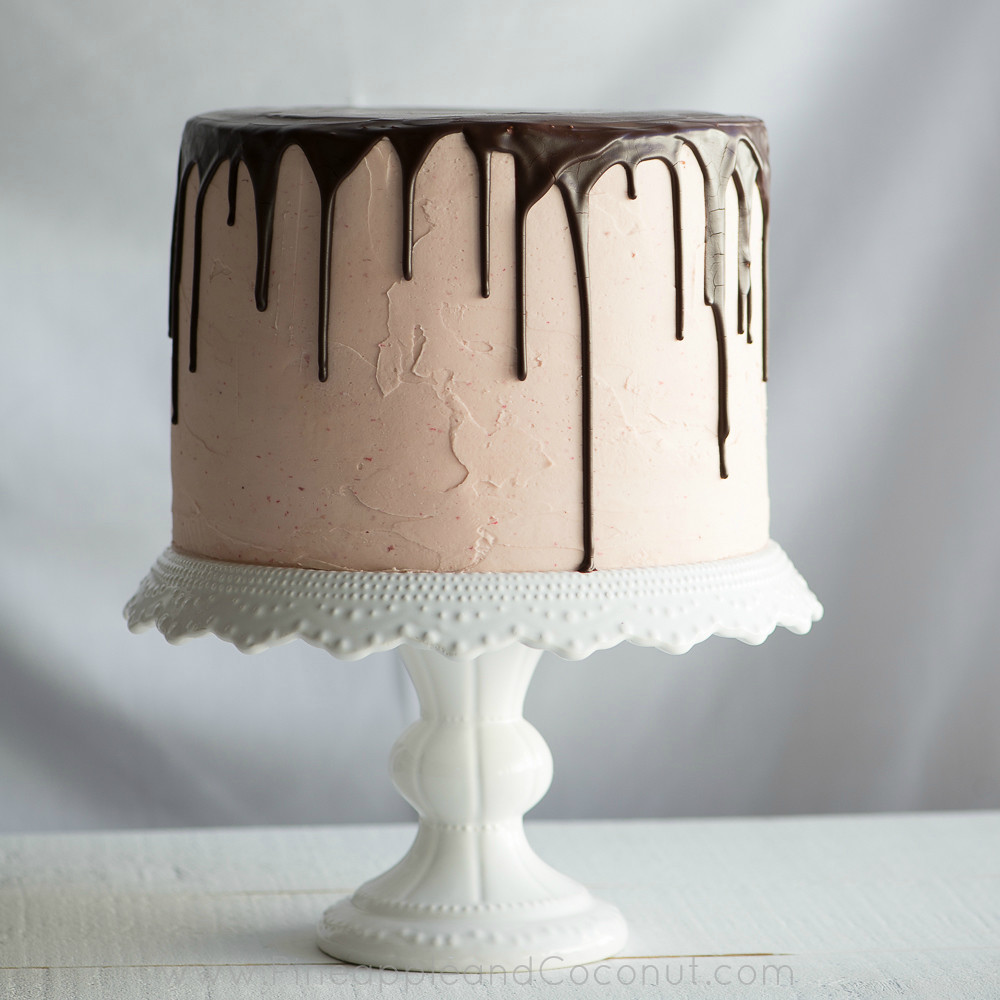
- Place one layer half on a cake circle on top of a cake plate or cake turntable. Spread a ¼” thick even layer of buttercream with an offset spatula. Place another cake half on top. Pipe a ¼’ thick circle of buttercream around the edges. Spread a very thin layer of the buttercream in the middle. Spoon in some of the raspberry filling until there is an even layer, about 3-4 tbsp. Place another cake layer on top. Repeat alternating layers of chocolate and vanilla cakes, the buttercream only filling and the thin buttercream and raspberry filling. Ending with a layer of cake and make sure the layers are all even. Chill about 20 minutes. Once the cake is slightly chilled spread a thin, even layer of buttercream with an offset spatula around and on top the cake. This is the crumb coat. Chill again 20-30 minutes. Finished frosting the cake with the remaining buttercream in an even layer around the sides and top, smoothing as you go. To make it super smooth heat an offset spatula in hot water, dry off and go around the sides in the same manner as the buttercream. It doesn’t have to be perfectly smooth. Chill again to set the buttercream. Once the buttercream is set, spread the ganache over the top with a small offset slowly making your way to the edges of the top and push a little of the ganache over at a time in random places to let it drip down the sides. You can vary the length of the drips with how much ganache you spread over. It will firm up. To cut perfect slices have the cake completely chilled, and heat up a long sharp knife. I keep the knife in a pot of boiling water. Wipe the blade dry and slice down from the top, once at the bottom pull the knife straight back towards you. Rinse the knife off and heat again. Dry and finish cutting the slice. Use a pie or cake server to carefully remove the slice from the cake. Repeat with remaining slices. Serve cake at room temperature.
Notes
Vanilla Cake slightly adapted from i am baker
Raspberry Buttercream Adapted from Cake Love This is a HUGE cake. You can halve it easily. Make two layers of chocolate only or two layers of vanilla only or halve each recipe for a layer of each. Cake batter freezes really well so if you want to make half the cakes but aren’t sure about halving a recipe, make the full recipe but save half the batter in a resealable freezer bag. When ready to use thaw to room temperature and its ready to bake.
The meringue buttercream is a more advanced buttercream. If you wish to make a more basic buttercream, I recommend using Martha Stewart’s fluffy vanilla buttercream and adding in the raspberry puree. Also the components to this cake can be made way ahead of time and kept frozen until ready to assemble because it is at least a two day project with baking and freezing and frosting and chilling etc.
The tuxedo cake can be made in sections ahead of time. Cakes can be made, wrapped in plastic, stored in reseable bags and frozen up to 3 months. Buttercream and puree can be made up to a week ahead of time and refrigerated. Thaw the buttercream to room temperature and whip on low before frosting the cake.
Renan Freitas says
I did this Saturday afternoon, but it turned out on Sunday .... It was very good.
Shanna says
yay!! I love hearing when recipes turn out great!
Ally says
For the raspberry puree in the buttercream, do you buy extra or just use some of what you made?
Shanna says
Use what I made
Jacky says
So if you freeze slices of cake you just defrost them in the fridge and then bring them to the room temperature?
Shanna says
Yes! This keeps them fresher longer. Just make sure they are wrapped well in the freezer. I usually do plastic wrap then in a resealble bag.