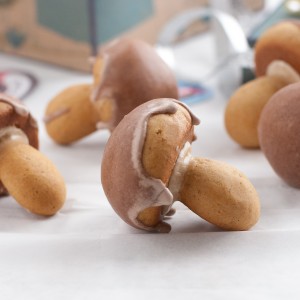
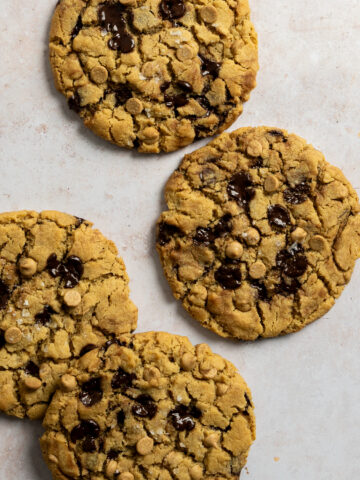
Spiced Mushroom Cookies. Lightly spiced cookies in a mushroom shape with a cocoa glaze. These are so fun and cute and I make them every year for my cookie gift box.

This page contains affiliate links. Affiliate links support Pineapple and Coconut at no additional cost to you. If you choose to make a purchase via these links, I earn a small commission to help keep this blog running and it is much appreciated. I am an Amazon and Adorama affiliate.
What makes these mushroom cookies so special:
These spiced mushroom cookies have been a holiday cookie staple in my life since I was a little kid. They are so cute and so delicious and a lot of fun to make. I made them with my mom when I was a kid and now my daughters make them with me. (These were originally made for a cookie swap which no longer happens).
I went through my cookie recipes trying to come up with something good, would hold up during shipping, and something special for the holidays. I know you're thinking "ummm mushrooms??" But let me explain.
First off, there were no real mushroom harmed in the making of these, they are merely shaped like mushrooms, second they don't taste like mushrooms either, they are a soft lightly spiced cookie with a cocoa glaze on top and a vanilla glaze as "glue" for the stems to stay in the caps.
Jump to:

Mushroom cookie ingredients:
- All purpose flour
- butter
- grantulated sugar
- large eggs
- yogurt
- honey
- Spices - cinnamon, nutmeg, allspice, cardamom, ginger, clove
- confectioners sugar
- cocoa powder
See recipe for exact amounts (in both metric and imperial)

How to make:
These cookies are really very easy to make if a little time consuming because of first - how long the dough needs to chill and the time it takes to roll the caps and stemps.
- Once the dough is made it is chilled at least 12 hours up to 24. This hydrates the dough well as well as really infuse it with the spices.
- Roll the caps and indent the bottoms for the hole for the cap. This will close up a little during baking but that is ok since you will reopen it a little with a knife.
- Bake the caps separately from the stems since they take a minute or two longer than the caps to bake.
- Have your icing ready to go to glue the stems and caps
- Whisk the cocoa powder into the icing to glaze the tops

Tip:
Dry the cookies upside down after glueing the stems to the caps with the icing. This way the stems will stay in the caps and not fall over or end up wonky.

Glazing the cookies:
Once the cookies are assembled, glaze the tops. I try to let as much of the cocoa glaze drip off the sides as much as I can before setting down to dry fully.

The icing drips down the sides of the cookies give them a little character.
How to store:
I either store these in a freezer bag or freezer safe container. Thaw to room temperature before eating.
Weighing ingredients Vs using cups:
I use my food scale and weigh out ingredients in grams because this is the most accurate way to get the best quality baked goods. Cups aren't accurate because not only are all cups not the same the sizes vary from brand to brand as well as from different countries. I have done tests with different brands of measuring cups and they all came out with different weights after I did the spoon and level as well as scoop method and then weighed in grams.
Baking is a science and science needs accuracy. Weighing is accurate and precise. Not to mention a lot easier. Another issue with cups is that I have no control over how people use measuring cups to measure dry ingredients especially flour. You could pack in way too much which would result in a sub-par baked good. Too much flour could throw everything off. Same with not enough. Not to mention also some ingredients are difficult to measure in cups such as nuts, dried fruit, chocolate etc. This is why weighing in grams is the most accurate.
I also use grams for most liquid measure since 100 grams equals 100 ml of water. Smaller amounts of items measured in teaspoons I usually leave as teaspoons, tablespoons are sometimes listed in grams as well but for the most part the different tablespoons I have used have all resulted in the same amount. Aside from cute, decorative ceramic tablespoons and teaspoons are never accurate. Those are better as decoration than for being used for baking.

These cookies make great gifts:
Like I mentioned earlier, these were originally for a cookie swap that is no longer, but they do ship well if wanting to send to friends or family.

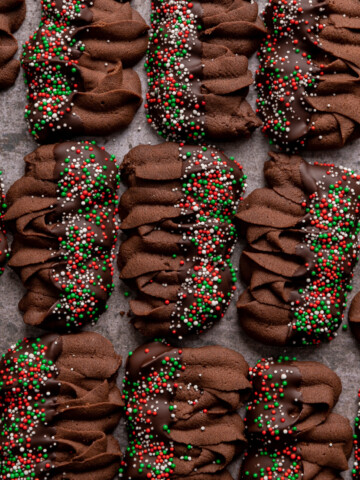
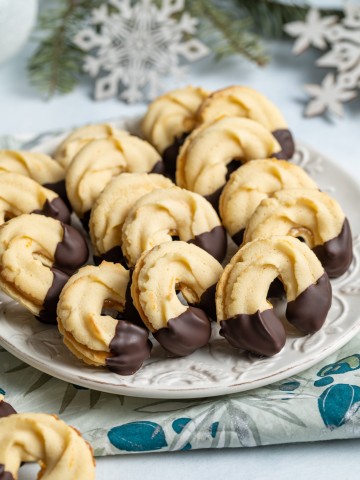
More holiday cookies:
A few more holiday cookie recipes to try:


Spiced Mushroom Cookies Recipe
Ingredients
- 57 g unsalted butter,, room temp (¼ cup)
- 100 6 granulated sugar, (½ cup)
- 2 large eggs, room temp
- 61 g plain yogurt, (¼ cup)
- 255 g honey, (¾ cup)
- 520 g all-purpose flour, (4 cups)
- 1 ½ teaspoon baking soda
- 1 ½ teaspoon ground cinnamon
- ½ teaspoon ground all-spice
- ½ teaspoon ground nutmeg
- ½ teaspoon ground ginger
- ¼ teaspoon ground clove
- ¼ teaspoon ground cardamom
- ¼ teaspoon kosher salt
For the Icing and "glue"
- 2 cups powdered sugar
- ¼ c water
- 1 tablespoon lemon juice
- 1 tablespoon cocoa powder
Instructions
- Baking times are 10-12 minutes for the mushroom caps, 8-10 minutes for the stems. Bake the caps separately from the stems.
- 1. Combine flour, baking soda, spices and salt in a medium bowl. Set aside
- 2. Cream butter and sugar until well combined. Add in eggs, mixing well after each addition.
- 3 Stir in yogurt and honey.
- 4. Slowly add in flour mixture and mix until well combined
- 5. Chill for 12 hours up to 24 hours.
- 6. Preheat oven to 375, prepare cookie sheets with parchment or silicone bake mats.
- 7. Once dough is chilled, scoop about a tablespoon sized ball for the mushroom caps. Roll the dough balls round in your hands and then make an indent on the bottom with the end of a small round wooden spoon handle. Gently press so you don't squish the dough too much. Place bottom side down on baking sheet.
- 8. For the stems roll about a half of a tablespoon of dough about an inch and a half long with one end pointed and the other slightly flat. Place stems on a separate baking sheet from the caps
- 9. Bake 10-12 minutes for caps. 8-10 for stems, if the holes in the caps close up, once cooled, scrape a little back out with a sharp knife, just enough to fit the pointed end of the stem in it. Match up stems and caps so they are ready to "glue" together.
- 10. For the icing: Combine sugar, water and lemon juice. Dip pointed end of stems in the icing, let excess drip off and insert into indent in caps. Place cap side down and let fully dry.
- 11. Add cocoa to the remaining icing and mix. Carefully dip the caps in the icing and lie on a wire drying rack and let fully dry. These keep well at room temperature in an airtight container for up to a week or frozen for several months.
Notes

Hope you have a wonderful holiday season filled with lots of cookies like my spiced mushroom cookies!
joanna says
what method do you use to shape the raw cookies on the baking sheet?
Shanna says
I shape by hand then place on the baking sheets.
Angel says
instead of lemon juice i used vanilla and YUM thank you for this recipe!
Shanna says
Love that. Thanks for sharing! These are such fun cookies to make and eat!
Alison says
Real ginger or ginger powder?
Shanna says
ginger powder
jelena loznica says
What does 1/2 c mean? is its Cups?
Shanna says
yes
Jazmine Frey says
Hi is this dough freezer friendly?
Shanna says
Yes it is!
Mackenzie Leighton says
Hi, almost all of my cookies cracked on the top, I'm not quite sure what I did wrong?
Shanna says
Sounds like either they over baked or you didn't roll them to a smooth ball before baking. The cracks could just add character too with the icing.